
Are you obsessed with crochet bags? Are you looking for an easy pattern to create a bag for summer and one for winter? Well, look no further. Thanks to our yarns and thanks to the ingenuity of Kate Alinari, our faithful crocheter who churns out many stunning patterns for us!
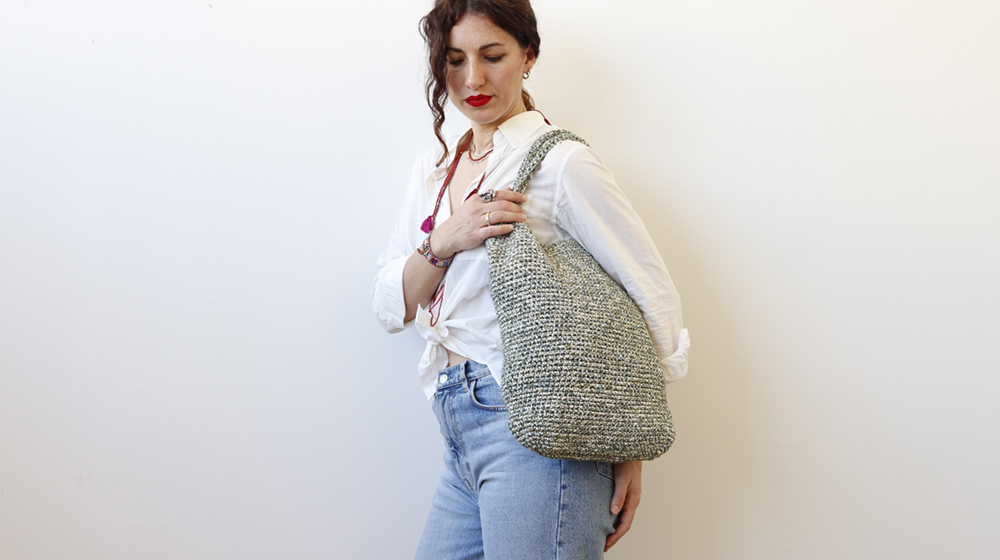
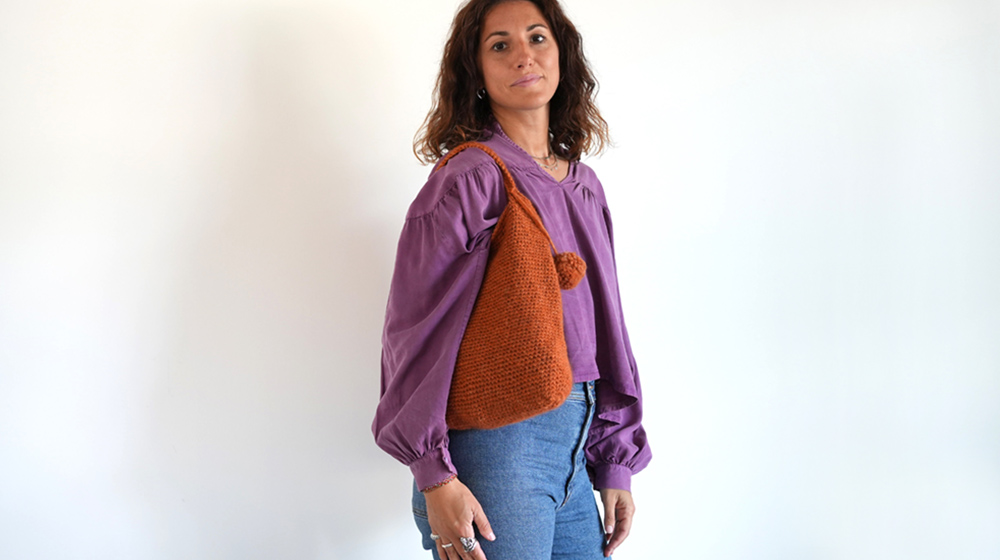
Today were offering you a free pattern for making an everyday bag with fairly short handles, allowing you to carry the bag both by hand and on the shoulder. The version with the Ariel yarn is a little larger, while the bag with the Sierra yarn is smaller. This depends solely on the difference in the yield of the yarn, the Ariel yarn is more compact and the Sierra is more voluminous and when worked becomes more compacted.
Ariel yarn has a recycled cotton base and a touch of lurex. It is precious and eye-catching, with a decisive personality. For this precise reason, it is especially suitable for linear projects. Here it is in Faroe colour.
Sierra yarn, on the other hand, is super warm and soft, thanks to the large percentage of baby alpaca. It has a wide colour chart. Here we have chosen the colour Rust. The Sierra version has been enriched with a cute pom pom.
Now all thats left to do is choose the variant you prefer and start working. Or maybe you like both and cant decide. In that case, throw yourself into both projects!
As mentioned previously, the crochet bag was made with a winter and a summer yarn.
MATERIALS
Ariel yarn col. Scotland 500 g / 17.6 oz (summer bag)
Sierra yarn col. Rust 200 g / 7 oz (winter bag)
Crochet hook n° 4.5 EU / 7 US
5 spiral stitch markers
Wool needle with large eye
GAUGE
10 cm x 10 cm / 4" x 4"
15 single crochets x 14 rounds worked in the round
STITCHES USED
Chain
Single crochet
Slip stitch
Increase
DIFFICULTY LEVEL
Easy
DIMENSIONS
Width 35 cm / 13.8"
Height 40 cm / 15.7"
NOTE
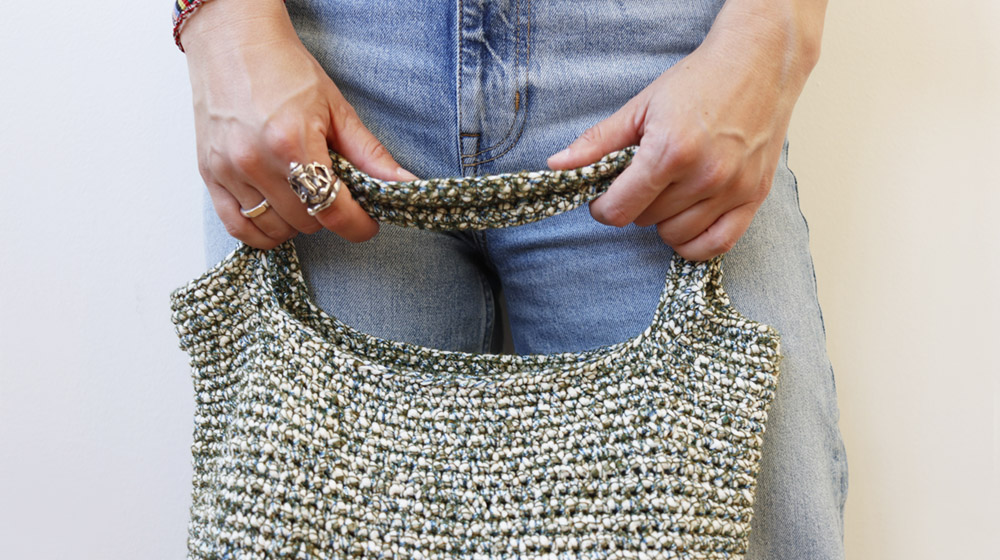
The bag is made from the bottom, starting with a strip worked in rows, then you continue working in the round to make the body of the bag and the handles. The bag is made in one piece, so no sewing is required.
METHOD
Loosely cast on 30 chains.
Row 1 (right side): the first chain counts as 1 stitch from here on, from the second chain on the hook work a single crochet in each chain until the end [30 single crochets]
row 2: chain1, turn, work a single crochet in each stitch of the previous row until the end of the row. [30 single crochets]
row 3: repeat row 2.
From here on, work in a spiral, that is, without closing the rounds with the slip stitch. It could be useful to mark the first stitch of the round with a stitch marker of a different colour than the one you will use on the round to mark the increases. Move this stitch marker to the first stitch each time you start a new round.
Round 1 (right side): chain 1 (does not count as a stitch), turn the work over and work 2 single crochets in the same stitch, 1 single crochet in the next 28 stitches, 2 single crochets in the last stitch of row 3, *rotate the work 90 degrees clockwise and continue working in the round, 6 single crochets corresponding to row 2 (place a stitch marker in the second and fourth stitch to mark the increases)*, rotate the work 90 degrees clockwise and continue working in the starting chain, 2 single crochets in the first chain, 1 single crochet in the following 28 chain stitches, 2 single crochets in the last chain stitch, *, repeat from * to * once more [76 single crochets]
round 2: work the entire round with single crochets and in the stitches marked with the stitch marker for the increases work 2 single crochets (move the stitch marker into the first single stitch of the increase) [80 single stitches]
round 3 and 5: repeat round 2. The number of stitches completed at the end of round 5 is 92.
Remove the four stitch markers to mark the increases and leave the one at the beginning of the round.
Round 6: work the entire round with single crochets [92 single crochets]
from round 7 to round 53: repeat round 6.
Remove the stitch marker.
Lay the bag out on the work surface and flatten it, mark the sides where the fold is formed with two stitch markers (46 single crochets between each stitch marker); continue working with single crochets until the first stitch marker, work a slip stitch in the following stitch. From here on, stop working in a spiral and close each round with the slip stitch (so the handles will be perfectly aligned).
Round 54: chain 1 (count as the first stitch from here on), move the stitch marker into the chain, 1 single crochet in the next 9 stitches, * chain 40, skip 26 stitches*, be careful not to twist or turn the chains, single crochet the following 20 stitches (move the stitch marker to the tenth stitch), repeat from * to * one more time, 1 single crochet in the following 10 stitches, close the round with a slip stitch. [2 groups of 20 single crochets and 40 chain stitches]
Move the stitch markers to the stitches of the round you are working.
Round 55: chain 1, work the entire round with single crochets (work 1 single crochet in each chain stitch), and close the round with a slip stitch [120 single crochets]
round 56: chain 1, work the entire round in single crochet, and close the round with a slip stitch [120 single crochets]
round 57: repeat round 56.
Cut and fasten all the threads inside the bag.
Remove the stitch markers.
If you have decided to make the crochet bag with Ariel yarn, you can choose whether to use the knitting both from the right side and from the wrong side, given that the yield of this type of yarn is very beautiful in both cases.
If you made the bag with Sierra yarn, you could customize and decorate your bag with a pom pom.
If you liked this tutorial and found it easy to make our crochet bag, then you might also like to discover all our patterns dedicated to crochet.


WRITE A COMMENT