
Let's brighten up our tables with some lovely Easter bunny shaped cupcakes! A tutorial which both the little ones and the grown-ups are going to love!
Cut out the felt silhouettes

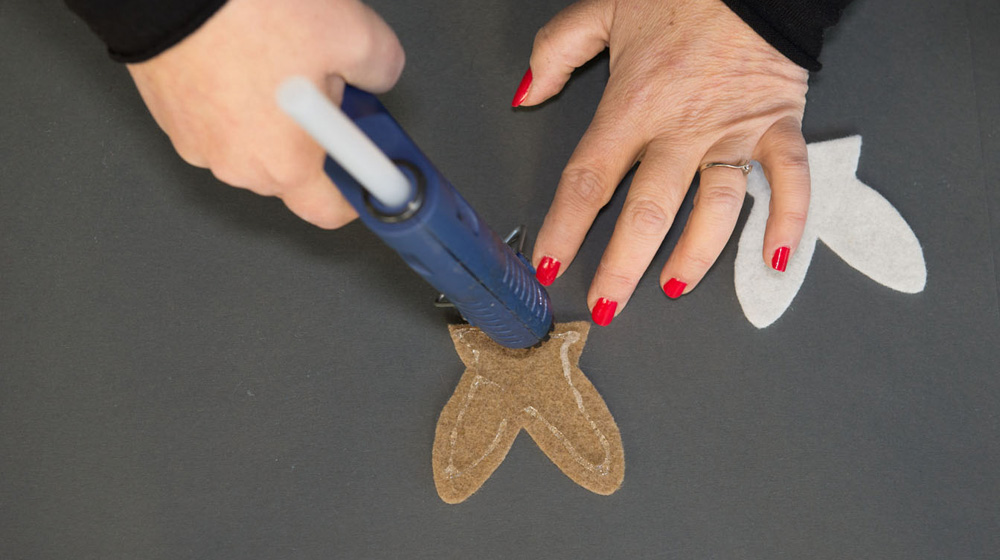
Put together the cutouts of the ears using some hot glue. The milky white felt cutouts must be glued to the taupe felt ones
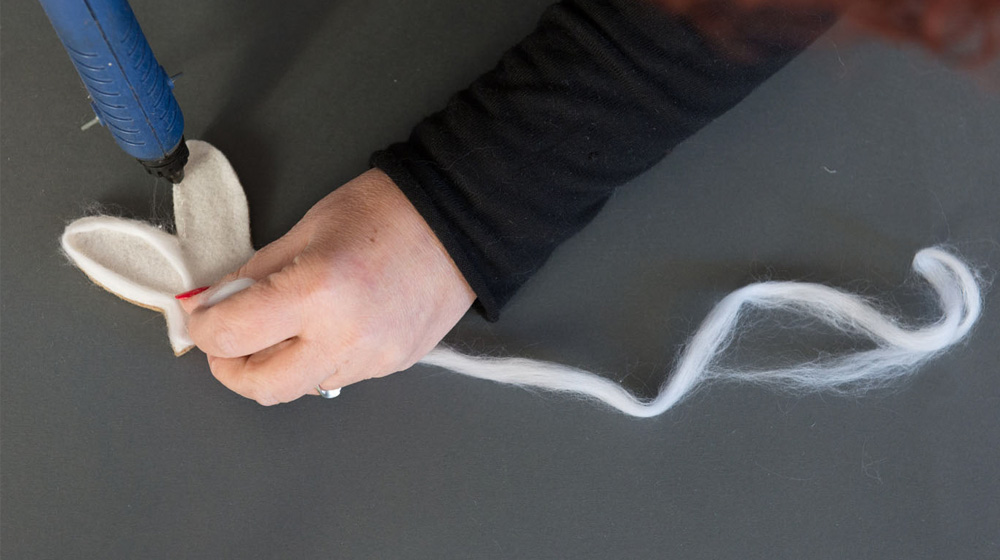
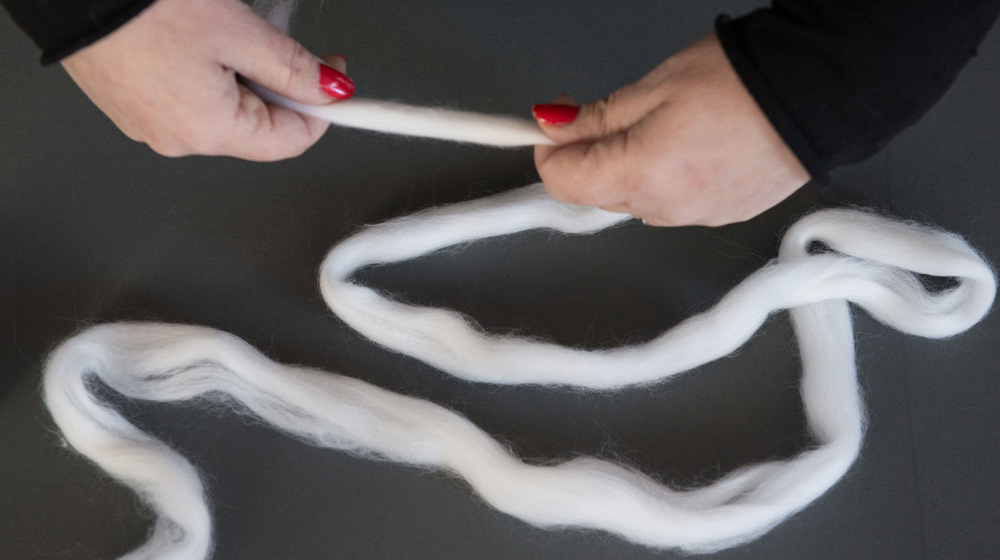
Use the snow-white woolen tops to make a string, around 3mm thick, and glue it as a frame all around the ears
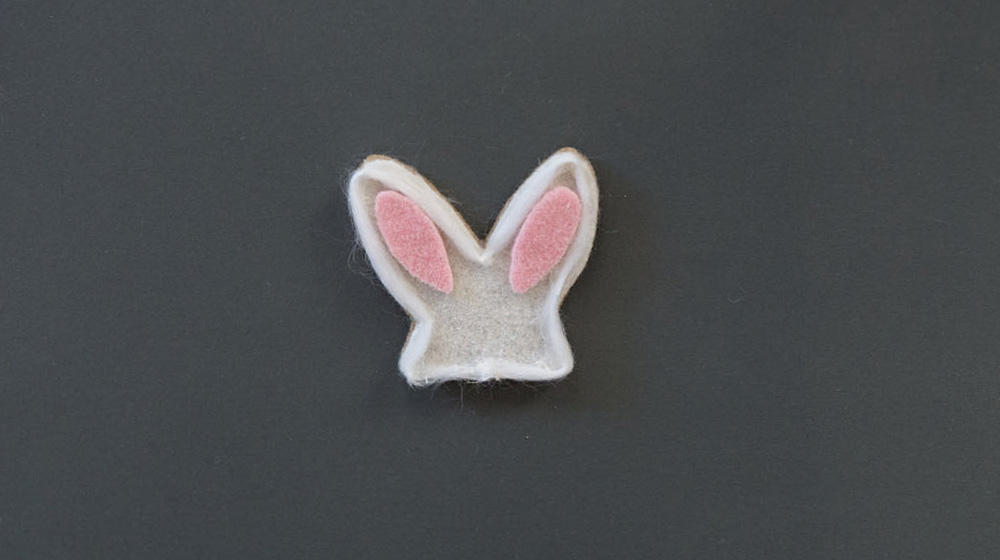
Glue the light dusty pink felt cutouts to the ears to finish them off
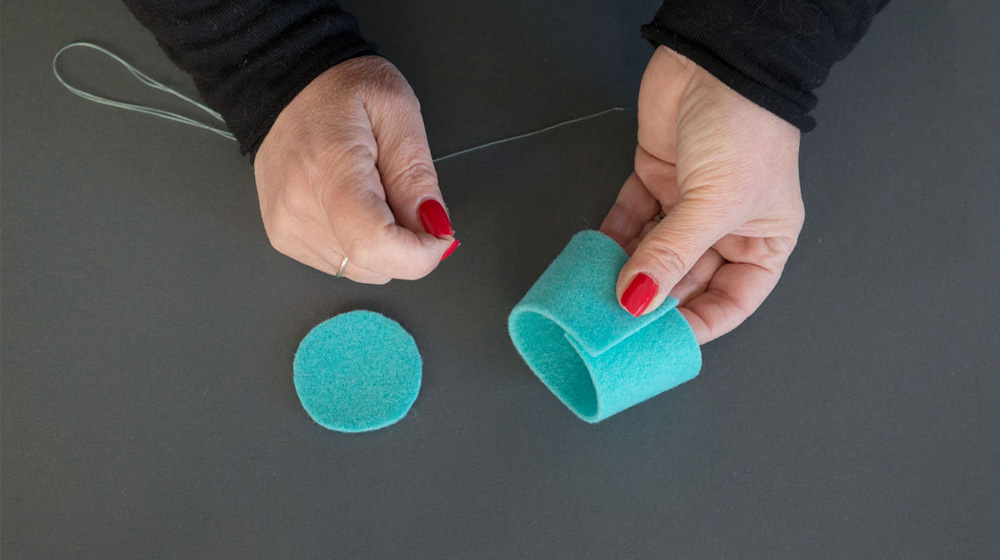
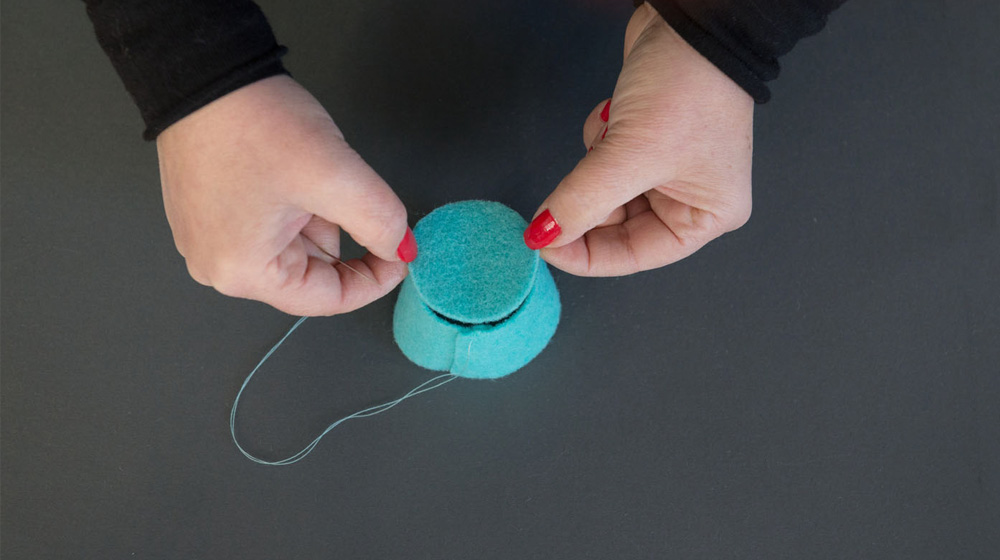
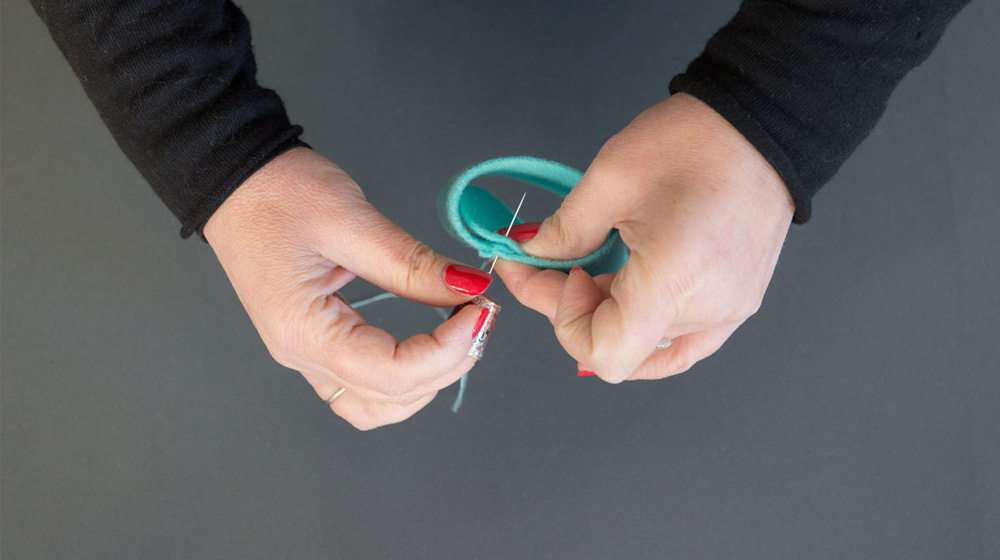
To make the cupcake cup, use the light teal felt cutout, putting one end on top of the other and fixing them with small stitches
Add the bottom of the cup: first apply a stitch on each of the four compass points, then proceed to saw it all around
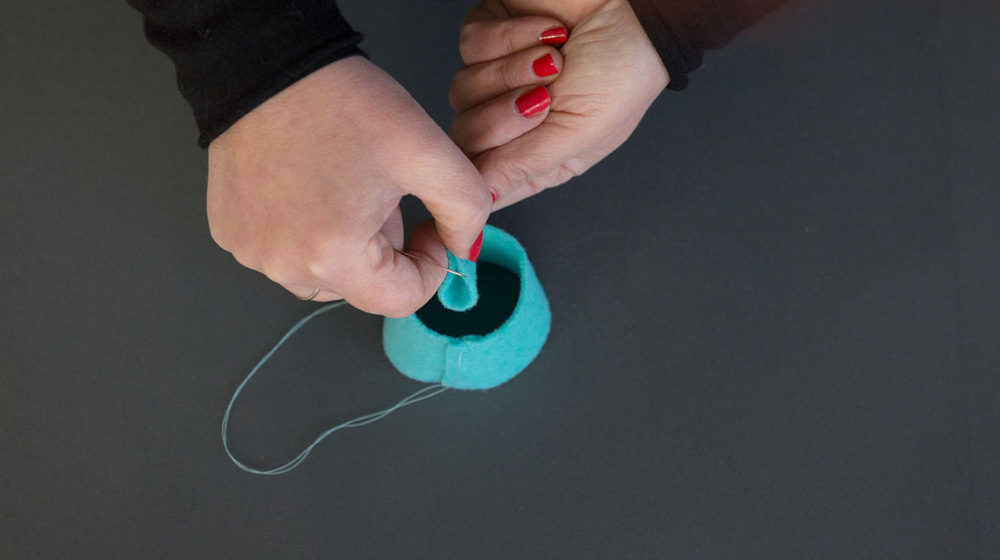
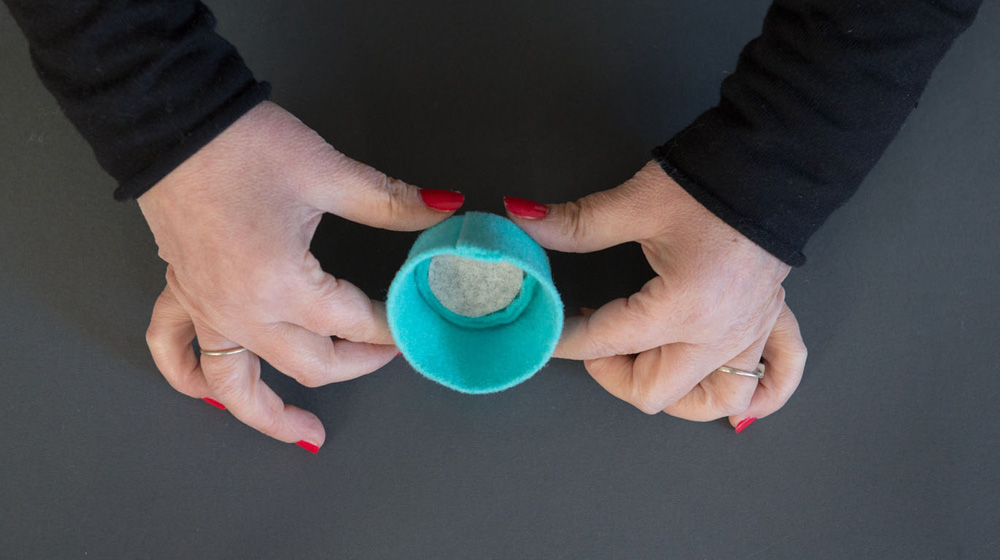
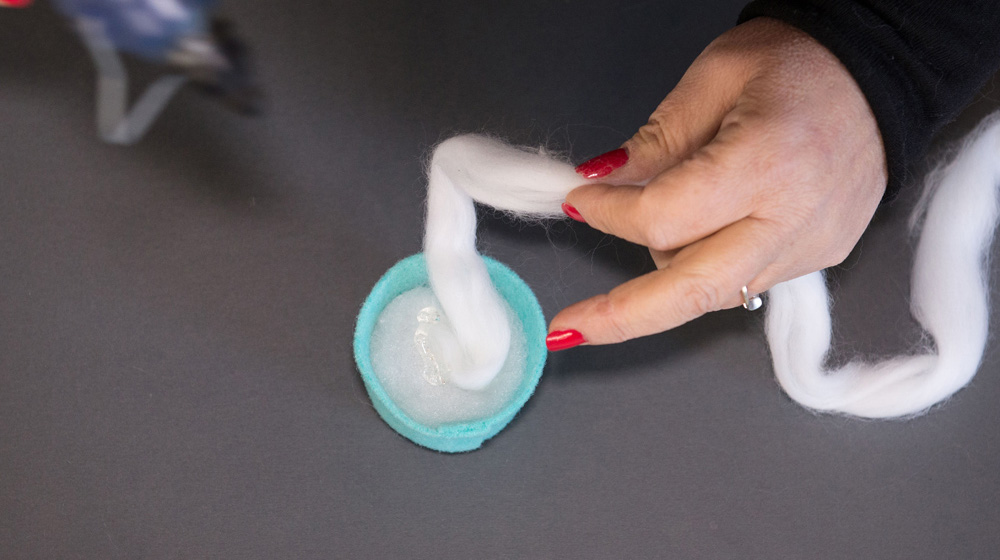
If you want, you can add some extra stability by inserting a material such as our 4mm Bergschaf felt at the bottom, and fill the cup to the brim with some wadding
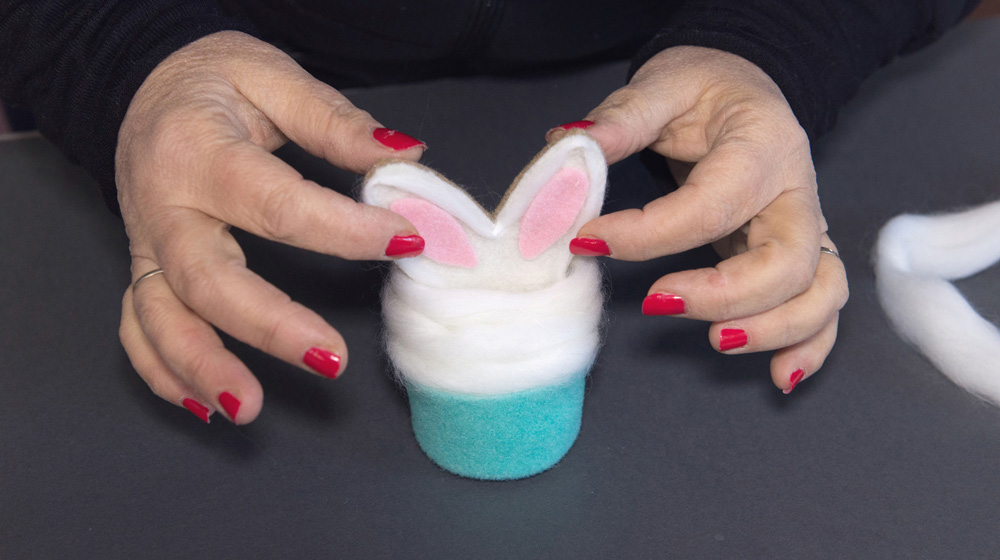
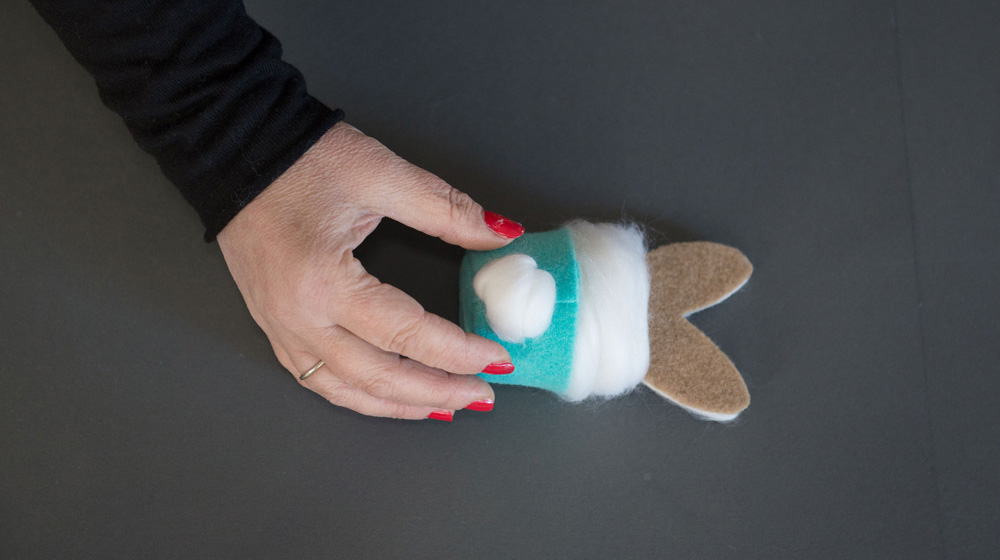
Use the milky white woolen tops to make the cupcake frosting, and wind it up on top of the cup with at least three spirals, hot glueing each layer

Put the ears into the frosting and finish it off with yet another milky white woolen tops spiral
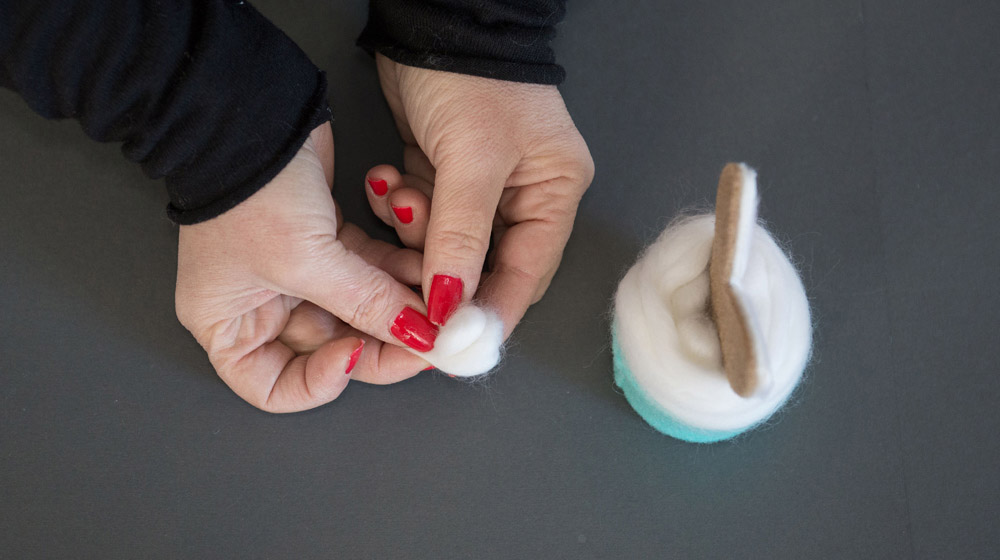
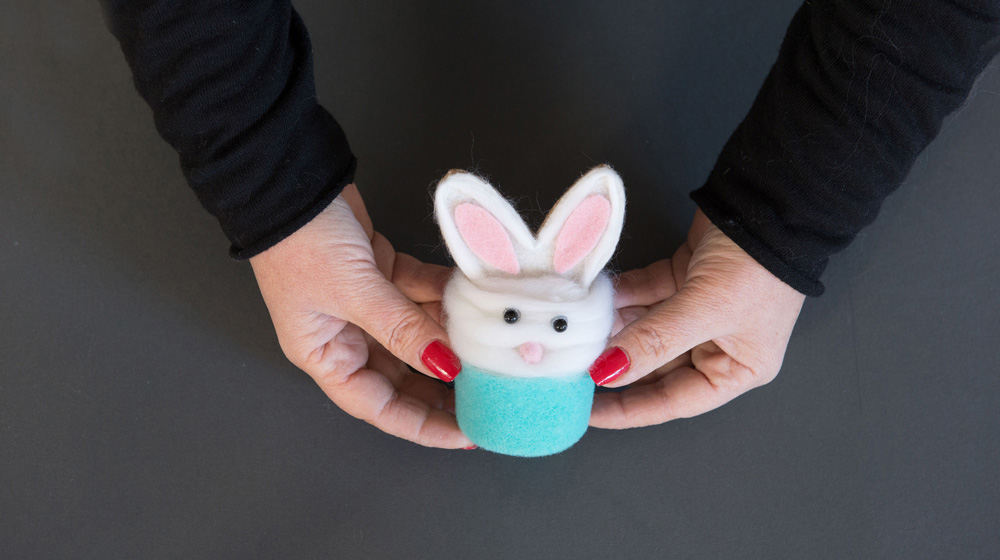
Glue two dark beads for the eyes, and cut a small circle out of the light dusty pink felt to make the bunny's nose. Add a little tail by rolling the milky white woolen tops into a pom pom and gluing it to the back of the cup
Your Bunny Cupcake is ready to keep you company over Easter!
You can now make Bunny Cupcakes with a thousand different color combinations! Free your creativity!
If you liked this article maybe you would also enjoy Thermoformable felt the tutorials!


WRITE A COMMENT