
Were now at the last stop on this little trip into Crafty Christmas, which involves learning how to make pretty 3D felt hearts. These rounded, pale coloured hearts by Lub Dup Felt are easy-peasy to copy (thats right, even this really cute tutorial is hers too). The list of materials that are required are the bare minimum and the steps are simple to follow.
Now all we have to do is start! These felt hearts are so cute, you wont be able to stop making them.
Let's get going!
MATERIALS
Extra fine merino wool col. Acacia 60 g / 2.1 oz
Extra fine merino wool col. Dune 60 g / 2.1 oz
Extra fine merino wool col. Caipirinha 60 g / 2.1 oz
Extra fine merino wool col. Marigold 60 g / 2.1 oz
Quipa yarn col. Saffron
Needle felt
Bases for needle felting
Warm water
Soap
Scissors
Cardboard
Soft pencil
Needle embroidery
Ruler
Before we start, Id like to tell you that with this technique you can make not only hearts but any shape that you can imagine.
METHOD
First, we will draw and cut off a heart in cardboard, this will serve us as a mold. To do this you should consider that the final piece will be 30% smaller than the initial mold. The measures may vary. In the example shown, I worked with an initial mold of 9 cm / 3.5" in height and 11 cm / 4.3" in width.


Then draw the hearts in the foam rubber with help of the mold and the pencil.

Cut the drawings by the line with the scissors.

Then, with the scissors, cut off the angles of the shape so that it is more rounded.

Cover the heart with 4 layers extra fine merino wool, placing it in different directions.

We will work with our needle felt only to fix the wool to the foam rubber.

Repeat the process on the other side of the piece.
Verify and rectify so that all the surface of foam rubber is covered with wool.

Submerge the piece in warm water with soap.

Start to rub the piece softly, repeat this process a few minutes and make sure to cover all the surface of the piece. After a while, the piece will begin to shrink. At this point you can start shaping the piece as you rub so that in addition to felting the wool you can give the desired shape to your piece.


When your piece has shrunk by about 30% you're going to press it to get out all the surplus water. Then you will re-shape it to let it dry with the shape you want it to have.


Once the piece is completely dry you can start decorating it. You can, for example, work with your needle felt and make colored polka dots.
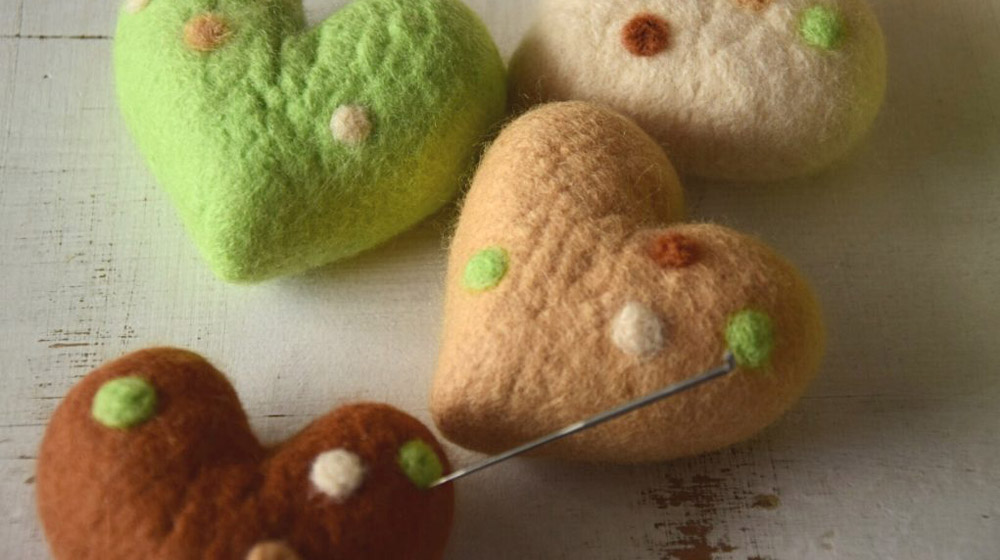
To finish you can use Quipa to make embroidered details and to assemble your garland.

And that's the felt hearts done! Aren't they gorgeous? Together with the felt stars, they are the perfect pair to decorate the tree, they could even be used as original place cards.

We hope you love these Christmas tutorials as much as we do. Together with our artist friends weve put our all into these projects and wed love to see your creations too. Tell us what you think of them and send us a photo of yours!
If youre not done making Christmas decorations yet, why not read the article on how to make a felt bow.


WRITE A COMMENT